
What is Database Matching?
Database matching is the process of identifying, matching, and merging records that correspond to the same entities from one or more database systems.
Database matching is used to compare and match the outlets found in the Trade Census with the existing outlets in the company’s outlet universe. This way the existing historical data can still be kept while the new data collected in the census is added.
What do we need for Database Matching?
- Outlet data found in the Trade census
- Outlet Universe (SEM) data
- QGIS
- OpenStreetMap
- EA area Map
- Excel file to keep track of the progress
How to use QGIS for Database Matching:
- Go the following link to download QGIS app, version 3.16. - https://qgis.org/en/site/forusers/download.html
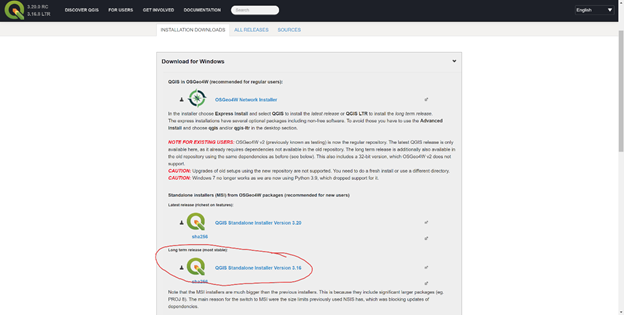
- If you received a file with Outlet data found in the Trade census and outlet Universe (SEM) data add it to your folder and skip to step 3 to 6. Otherwise follow the next steps.
- Extract the outlet data found in the Trade census in .csv format from Power BI (How to extract data from PowerBI report)
- Get the outlet Universe (SEM) data in .csv format
- Open QGIS select Layer > Add Layer > Add Vector Layer > on File name select Browse > locate and open OpenStreetMap .KMZ file > Add
- Open QGIS select Layer > Add Layer > Add Vector Layer > on File name select Browse > locate and open EA Area Map .KMZ file > Add and repeat this step for all EA areas
- Open QGIS select Layer > Add Layer > Add Delimited Text Layer > on File name select Browse > locate and open Trade census data .csv file > File format select CSV > Geometry Definition select point coordinate, X field select Latitude, Y field select Longitude, Geometry CRS select Project CRS > Add > Exit
- On the Left side on Layers panel select Layer Styling Panel > Labels > select single Labels > Value select Outlet Name > select Text, Formatting, Buffer adject the text size, color, background etc. as preferred. In this example we will use red for Client Universe and green for TC outlets.
- Repeat step 6 and 7 to add and edit Universe (SEM) data Layer
- We suggest doing the matching one area at the time, that way multiple people can also work on different areas at the same time. You can see an overview of all the areas on the bottom left corner.
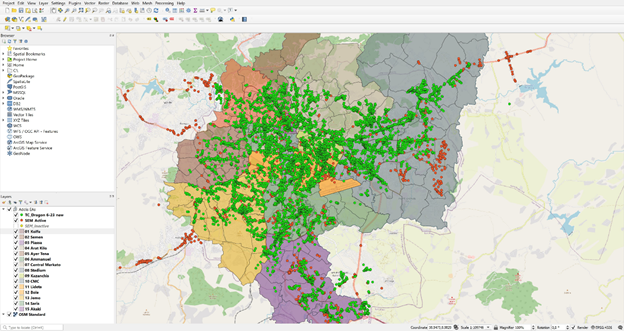
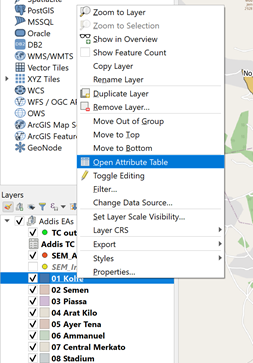
Each Area is divided into smaller zones which you can see an overview of when you right click the area and select “Open Attribute Table”
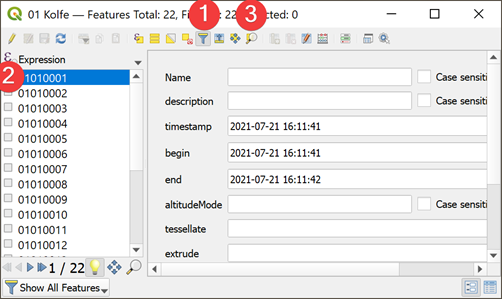
If you turn on the filter button you can select one or more sub areas and zoom in on them by clicking on the Zoom map button.
- Once you have selected and found an area you want to start with you can begin the matching process. A good strategy is to start going from the borders of the chosen area towards the middle.
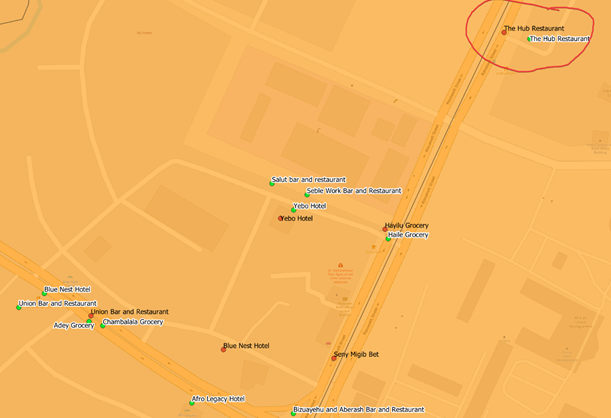
You will need to compare the red dots (Client Universe) to the green dots (TC outlets) and identify matches. The easiest way to do this is based on the outlet location and name. Once you identify a match (for example The Hub Hotel on the picture below) you will need to note in the excel file based on the outlet ID.
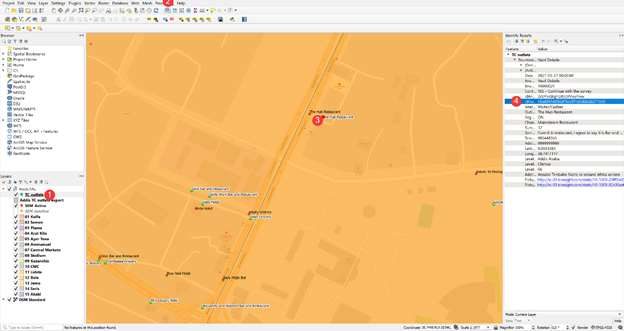
- To find an outlet ID for a TC outlet click on TC outlets layer on the bottom left corner, then click on the
 icon on the top bar and then click the TC outlet for which ID you are looking. An overview of the outlet information will appear on the right side of the screen including idOutlet. To copy the ID right click on it and select copy attribute value. Then repeat the same process for the matched outlet from the universe.
Comments
0 comments
Please sign in to leave a comment.